Install linux system easy

How to Create a Linux Mint Bootable USB Installer

🎥 How to Create a Linux Mint USB

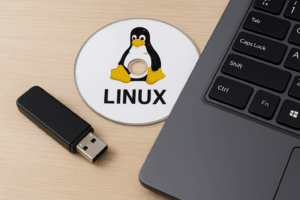
Creating a bootable USB drive is the essential first step to installing or testing Linux Mint on your computer. This process turns a simple USB stick into a powerful Linux installer, allowing you to boot the operating system without affecting your current setup.

Why a Bootable USB?


How to Create a Linux Mint Bootable USB InstallerLearn how to quickly create a Linux Mint bootable USB installer using Etcher or Rufus. Follow this simple guide to turn your ISO into an installation drive for Mint, Ubuntu, Debian, and more!

How to Create a Linux Mint Bootable USB Installer

Using a USB installer is generally the fastest and most convenient method for installing modern Linux distributions. Once created, you can use the USB drive for several purposes:

  • Installation: Permanently install Linux Mint onto your hard drive.

  • Live Environment: Test drive the full operating system without installation, saving files, and checking hardware compatibility.

  • System Rescue: Use the Mint environment to troubleshoot or repair issues with another installed operating system.


Follow the video to easily make a bootable USB flash drive. Just pause the video whenever you need. Perfect even for beginners!


1. Download the ISO Image

  1. Visit the official website of the Linux distribution. For example, Linux Mint here, or Ubuntu here, or another one of your choice.
  2. Download the system image: linux.iso

2. Create a Bootable Linux USB (from Windows)

Use the program Rufus:

  1. Download it from https://rufus.ie
  2. Plug in your USB drive and launch Rufus
  3. Set it up as follows:
    • Device: select your USB drive
    • Boot selection: select the downloaded ISO file
    • Partition scheme: GPT (for newer PCs with Windows 10 or 11 and UEFI, roughly since 2012) or MBR (for older Windows 7, Vista, XP with UEFI-CSM or BIOS)
    • File system: FAT32
  4. Click START and confirm to erase the USB drive

*Warning: The USB drive will be completely erased!

Once complete, your Linux Mint bootable USB is ready. The final step is to restart your computer and select the USB drive as the boot option in your BIOS/UEFI settings to begin the installation or live test.

https://www.balihobi.com/how-to-install-linux-mint/

How to choose a Linux distribution?

Which Linux distribution should you choose? 🤔

Which Linux distribution should you choose? 🤔 👉 And you? Which distribution would you choose? Share it in the comments! 💬

  • Beginners: Linux Mint, Ubuntu, Zorin OS

  • Intermediate users: Fedora, openSUSE, Manjaro

  • Experts: Arch, Gentoo, Slackware

  • Servers: Debian, Rocky, AlmaLinux

  • Security testing: Kali Linux

There’s something for everyone – depending on your PC’s performance, design preferences, or purpose.
👉 And you? Which distribution would you choose? Share it in the comments! 💬

A Linux distribution is a "package" of an operating system built on the Linux kernel. Each distribution is different, but they all allow you to use your computer freely without relying on Windows or macOS. You can choose the one that suits you best — based on your computer's performance, appearance, or intended use.


Main and Most Popular Linux Distributions

Here are the main "parent" distributions + their derivatives:

Ubuntu
(based on Debian)

Guide and installation HERE
August 2025

Ubuntu installation

Beginners, regular users - User-friendly, stable, popular system with a large community.


  • User-friendly, ideal for beginners
  • Uses APT, .deb packages
  • Various official flavors (Kubuntu, Xubuntu, Ubuntu MATE…)
  • Huge community and support

Complexity: 🟢 (Beginners, regular users)


Pop!_OS

Guide and installation HERE

Installing Pop!_OS 24.04 LTS with COSMIC Desktop – Complete GuidePop!_OS is a Linux distribution developed by System76, based on Ubuntu LTS. Version 24.04 introduces the new COSMIC desktop environment, designed to be modern and user-friendly – perfect even for complete beginners. This guide will walk you step by step through the installation process, including setting up a dual-boot system with Windows 11.

Category: Beginners, regular users
Description: User-friendly, modern, and stable system with its own philosophy and enhancements over Ubuntu. Very popular, with an active community and solid documentation.

  • User-friendly, suitable for beginners

  • Based on Ubuntu LTS (uses APT, .deb packages)

  • Custom desktop environment COSMIC (optimized for productivity and multitasking)

  • Strong support from System76 and the community

  • Frequent updates and optimizations for modern hardware (especially laptops and graphics cards)

Complexity: 🟢 Beginners, regular users


Linux Mint 

(based on Ubuntu/Debian)

Guide and installation HERE


Linux Mint installation

Simple Windows-like environment, ideal for beginners switching from Windows.

  • Designed for an easy transition from Windows
  • Includes codecs, drivers, etc.
  • Cinnamon desktop – very similar to Windows

Complexity: (Complete beginners switching from Windows)
Linux Mint is a great choice for those who have no Linux experience and want to start using it.


Debian

Guide and installation HERE


Debian installation

Servers, advanced users - Extremely stable distribution with long-term support, base for other systems.

  • Package manager: .deb, APT
  • Stable and conservative (infrequent updates)
  • Great for servers and reliable systems
  • Derivatives: Ubuntu, Linux Mint, Kali Linux

Complexity: (Servers, experienced users)


Manjaro

Guide and installation HERE

(based on Arch)


Manjaro installation

Intermediate users - More user-friendly version of Arch Linux, suitable for daily use.

  • User-friendly Arch
  • Automatic installations, GUI installer, repositories
  • Variants: XFCE, KDE, GNOME

Complexity: (Advanced users wanting a user-friendly Arch system)


Zorin OS

Guide and installation HERE


Zorin OS is a user-friendly Linux distribution built on Ubuntu LTS. It targets beginners and users switching from Windows/Mac with a focus on simplicity, stability, and a polished look. This guide explains what Zorin OS offers, who it’s best for, and how to perform a clean install or a dual-boot alongside Windows 10/11.

Beginners, switching from Windows - Elegant system with a Windows-like environment. Great for new users.

  • Targeted at users coming from Windows/Mac
  • Easy interface, fast, nice GUI
  • Mostly based on Ubuntu/Debian

Complexity: Low


Fedora

Guide and installation HERE


Fedora installation

Developers, testing new features - Modern, fast-evolving system with the latest technologies.

  • Uses .rpm packages, DNF package manager
  • Very up-to-date software – bleeding edge
  • Developer-supported by Red Hat
  • Often tests new technologies for Red Hat

Complexity: (Developers, geeks)


openSUSE

Guide and installation HERE


A complete step-by-step guide: preparation, creating a bootable USB, disk partitioning (UEFI), GRUB installation, first boot, and troubleshooting. Includes a clear disk partitioning table.

Advanced users, businesses - Stable and powerful system, also great for servers. Leap and Tumbleweed versions.

  • openSUSE Leap (stable) and Tumbleweed (rolling)
  • RPM + Zypper package manager
  • YaST tool – easy system management
  • Suitable for servers as well

Complexity: (Advanced users, servers, development)


Red Hat Enterprise Linux (RHEL)


Red Hat

  • Commercial distribution – stable, long-term support
  • Intended for businesses, servers
  • Derivatives: CentOS Stream, Rocky Linux, AlmaLinux

Complexity: (Servers, businesses)


Arch Linux


Arch Linux

Advanced users - Minimalist system for those who want to configure everything themselves.

  • Rolling release (no versions – always up-to-date)
  • For experienced users – all setup is manual
  • Excellent documentation (Arch Wiki)
  • Derivatives: Manjaro

Complexity: (Experienced users)


Summary of differences:

Distribution For whom? Stability Updates Complexity
Debian Servers, advanced users High Low Medium
Ubuntu Beginners, regular users Good Medium Low
Mint Users from Windows Good Medium Low
Fedora Developers, geeks Medium High Medium
Arch Experienced, customization Low High High
Manjaro Users wanting Arch Good High Low
openSUSE Servers, development High Depends on version Medium
Gentoo Hackers, enthusiasts High High High

TIP:
VirtualBox official web site
Try Linux safely in VirtualBox!

Want to try Linux without risking wiping your computer? Learn how to run it virtually in VirtualBox. Full guide here: https://www.balihobi.com/virtualbox/

Top Linux Hardware Databases – Check What Works with Linux


Top Databases of Working Hardware for Linux

Top Linux Hardware Databases – Check What Works with LinuxIf you’re switching to Linux or building a new PC, it’s a good idea to check which hardware components work flawlessly with it. Not every graphics card, Wi-Fi adapter, or printer has reliable Linux drivers. Luckily, there are several large databases where you can easily verify hardware compatibility before you buy.

Linux Hardware Databases

If you’re switching to Linux or building a new PC, it’s a good idea to check which hardware components work flawlessly with it.
Not every graphics card, Wi-Fi adapter, or printer has reliable Linux drivers.
Luckily, there are several large databases where you can easily verify hardware compatibility before you buy.


 Linux Hardware Database (linux-hardware.org)

🔗 https://linux-hardware.org

This is currently the largest and most up-to-date Linux hardware database.
It contains millions of records about motherboards, CPUs, GPUs, monitors, and peripherals.
The data is collected directly from users through the hw-probe tool.

➡️ You can filter results by distribution, kernel version, or specific device.
✅ Highly recommended – accurate, open, and community-driven.

Linux Laptop Wiki

🔗 https://linux-laptop.net

This site focuses entirely on laptops.
Each entry describes which components work and which do not — such as Wi-Fi, touchpad, audio, or suspend mode.
Most information comes from real users sharing their experience with different Linux distributions.

Ubuntu Certified Hardware

🔗 https://ubuntu.com/certified

An official database by Canonical, listing hardware certified for Ubuntu.
If you want a guaranteed smooth experience without manual tweaking, this is the best place to start.
It’s also valid for Ubuntu-based distributions like Linux Mint, Zorin OS, and Pop!_OS.

Fedora Hardware Compatibility List (HCL)

🔗 https://fedoraproject.org/wiki/Category:Hardware

A smaller but useful list of compatible hardware contributed by Fedora users.
You can also find troubleshooting notes for specific kernel or driver issues.

Arch Linux Wiki – Hardware Compatibility

🔗 https://wiki.archlinux.org/title/Category:Hardware

The Arch Wiki isn’t a typical database, but it contains a huge amount of information about hardware components.
You’ll find detailed guides for setting up graphics cards, network adapters, sound chips, and specific laptop models.
Perfect for users who like to fine-tune their systems manually.

Phoronix Hardware Database

🔗 https://openbenchmarking.org

This database is focused on performance testing under Linux.
It includes thousands of benchmark results for CPUs, GPUs, SSDs, and more.
It’s ideal if you want to compare the performance of different components or check how they perform on specific kernels or distributions.


If you want to be sure your hardware works well with Linux, start with linux-hardware.org — it’s the most complete and reliable resource.
And before buying a new laptop or PC, always check it in the Ubuntu Certified Hardware list.

These databases can save you hours of frustration and ensure your Linux experience is smooth and driver-friendly.


Hey Linux friends!

We’ve all faced that moment of doubt: will my new laptop, graphics card, or even a tiny USB adapter work with Linux? Sometimes it’s smooth sailing, other times it feels like a lottery. That’s why it’s so valuable to share our experiences and help others find hardware that just works without the headaches.

Share your hardware stories – what works, what doesn’t – and make life easier for fellow Linux users.

Are you running Linux on your desktop, laptop, GPU, network card, or even a sound card? Tell us how it’s working for you!

At some point, we’ve all asked: “Will this device work with Linux?” Your feedback could save someone else time, frustration, and money.

How can you share?

Just drop a short post including:

  • the name and exact model of your device,
  • the chip ID (you can grab it with lspci or lsusb),
  • the distribution you’re using,
  • and a quick note about what works well and what still causes trouble.

Why bother?

👉 You’ll help other Linux users choose hardware that actually works.
👉 Your post will be added to our list of verified devices.
👉 Together we’re building a community-driven database that makes Linux life easier for everyone.

Need inspiration?

You don’t have to be a pro – just share your real experience. Whether it’s a gaming rig, an old laptop, a graphics card, or a simple USB dongle, every bit of info helps.


🔧 So, what do you think?

Help the community – post a comment about how Linux runs on your hardware.


What can you find here?

In this section, you’ll discover a collection of laptops, printers, motherboards, graphics cards, and other peripherals that, according to real community experiences, work smoothly with Linux and don’t cause major headaches. Later, I’ll be adding more tested hardware based on your experiences shared in the comments.

Best Printers for Linux Beginners 2026

Best Printers for Linux Beginners 2026


Printing Without Stress: Best Printers for Linux Beginners 2026

Switching to Linux can be exciting, but sometimes also a bit intimidating – especially if you’re worried about installing drivers and dealing with complicated settings. The good news? There are plenty of printers that work on Linux straight out of the box – no endless package searches, no compiling drivers, no confusing terminal commands.

Why Compatibility Matters

Not all printers are equally supported on Linux. Some models may be advertised as “universal,” but in reality, they require manual installation of special drivers. For beginners, this can quickly become frustrating. That’s why it’s best to choose models that are either natively supported in Linux or use driverless printing technology.

How to Spot a Beginner-Friendly Linux Printer

  • Official Linux support from the manufacturer (DEB/RPM packages available on the official site)
  • Full compatibility with CUPS (Common Unix Printing System)
  • Driverless printing support (IPP Everywhere, AirPrint)
  • Active community and user reviews on sites like OpenPrinting.org

Recommended Printers for Linux Beginners (2026)

1. HP DeskJet 4120e / 4130e

  • Type: Inkjet all-in-one (print, scan, copy)
  • Pros: HP offers excellent Linux support through the HPLIP package, which is often preinstalled. Setup takes just a few minutes.
  • Why for beginners: Automatically detected after connecting via USB or Wi-Fi.

Buy Now – Amazon.co.uk 


2. HP LaserJet M110we

  • Type: Monochrome laser printer
  • Pros: Low running costs, quick start-up, minimal maintenance.
  • Why for beginners: Works on most Linux distributions without manual driver installation.

Buy Now – Amazon.co.uk 


3. Epson EcoTank ET-2850

  • Type: Inkjet all-in-one with refillable tanks
  • Pros: Very low printing costs thanks to refillable bottles, excellent color quality.
  • Why for beginners: Well-supported through Epson’s Linux drivers or directly via driverless printing.

Buy Now – Amazon.co.uk


4. Brother HL-L2350DW

  • Type: Compact monochrome laser printer
  • Pros: Space-saving, fast printing, Wi-Fi and USB connectivity.
  • Why for beginners: Brother provides a clear Linux driver page and an easy-to-use installation script.

Buy Now – Amazon.co.uk 


5. Canon PIXMA G3570

  • Type: Inkjet all-in-one with tank system
  • Pros: Low operating costs, color printing, Wi-Fi connectivity.
  • Why for beginners: Works with CUPS and Canon’s Linux packages for Ubuntu/Debian.

Buy Now – Amazon.co.uk


Final Tip

If you’re a complete Linux beginner, choose models that:

  • Offer USB connectivity (simpler first setup compared to Wi-Fi)
  • Are listed as “Works Perfectly” on OpenPrinting.org
  • Have confirmed full Linux functionality in user reviews

That way, you’ll be printing within minutes of unboxing – instead of spending the whole evening in the terminal.


Linux vs Windows? - Bottom line: Linux is an excellent choice if you want a stable, secure, and customizable system for free. Windows 11 is ideal when you need maximum compatibility with commercial software and the best gaming experience. Choose based on your workload, hardware, and comfort level.

Linux vs Windows 11: A Complete Comparison

Linux vs Windows 11? A Practical Guide for Everyday Users

The operating system is the backbone of every computer. Most people default to Windows, but there’s a powerful alternative: Linux. This article explains why Linux can be a great substitute for Windows 11, what advantages it brings, and which drawbacks you should expect.


When to Use Linux

Everyday use & productivity:

For web browsing, email, video streaming, office documents, and other common tasks, Linux provides everything you need. User-friendly distributions like Ubuntu or Linux Mint offer smooth setup and a rich app catalog.

Programming & development:

Linux shines for developers with first-class tooling (languages, frameworks, containers) and wide adoption on servers and cloud platforms.

Low hardware requirements:

On older or low-power PCs, lightweight flavors such as Xubuntu or Lubuntu run faster and feel more responsive than a full Windows install.

Security & privacy:

Linux is known for robust security. With fewer malware targets and fast updates, it’s a safer default for many users.

Open-source software:

If you prefer free and open tools, Linux offers a huge selection for office work, graphics, development, and more.

Learning & experimentation:

Linux is ideal if you want to understand and customize your system. You can tweak almost everything—far beyond what Windows allows.


When to Use Windows

Gaming:

If you play the latest AAA titles or rely on anti-cheat systems that don’t work on Linux, Windows remains the safest choice.

Specific commercial software:

Apps like Microsoft Office (desktop), Adobe Photoshop/Premiere, AutoCAD, or specialized pro tools often run best—or only—on Windows.

Peripheral compatibility:

Some printers, scanners, game controllers, and specialty devices have better or exclusive Windows drivers.

Corporate environments:

If your workplace mandates Windows-only VPNs, management tools, or line-of-business apps, you’ll likely need Windows.


Price & Availability - Linux or Windows 11

  • Linux: Most distributions are free and open source; you can download and install them without paying a license fee.
  • Windows 11: Requires a paid license (often included with a new PC).

Security

  • Linux: Strong security model, fewer malware targets, rapid updates from repositories.
  • Windows 11: The biggest target for attackers due to market share. Includes advanced security features, but typically benefits from additional antivirus/EDR tools.

Stability & Performance

  • Linux: Known for long uptimes and consistent performance over time.
  • Windows 11: Optimized for modern hardware, but can slow down over long periods and heavy software turnover.

Flexibility & Customization

  • Linux: Many distributions (Ubuntu, Debian, Fedora, Mint, Arch, etc.) and desktop environments (GNOME, KDE Plasma, Xfce) let you tailor the system to your workflow.
  • Windows 11: Cohesive design, but with limited deep customization.

Software & Compatibility

  • Linux: Rich open-source alternatives (e.g., LibreOffice for Office, GIMP for Photoshop). Some Windows apps run via Wine or Proton, but not all work perfectly.
  • Windows 11: Broadest compatibility with commercial and professional software suites.

Gaming

  • Linux: Support is improving thanks to Steam Play (Proton); many titles run well, but not everything is flawless.
  • Windows 11: Best overall gaming support (DirectX, drivers, anti-cheat, launchers).

Support & Community

  • Linux: Large, helpful communities (forums, wikis, chats) and vendor wikis (Ubuntu, Fedora, Arch, etc.).
  • Windows 11: Official Microsoft support plus a wide ecosystem of paid and free help resources.

Installation & Ease of Use

  • Linux: Modern installers (Ubuntu, Linux Mint, Fedora) are beginner-friendly. There is a learning curve for new users.
  • Windows 11: Generally straightforward to install, but may involve license selection, online account setup, and vendor utilities.

Linux or Windows - Summary

Factor Linux Windows 11
Price Free Paid license
Security Strong, fewer malware targets Advanced features, popular malware target
Stability High, long uptimes Good, can slow over time
Flexibility Extensive customization options More limited
Software Open-source alternatives, Wine/Proton Best commercial app support
Gaming Improving, not universal Best overall support
Support Community-driven Official + third-party

Bottom line:

Linux is an excellent choice if you want a stable, secure, and customizable system for free. Windows 11 is ideal when you need maximum compatibility with commercial software and the best gaming experience. Choose based on your workload, hardware, and comfort level.

For more official information, follow the Windows Blog at https://blogs.windows.com/ and the Linux Foundation Blog at https://www.linuxfoundation.org.


Categories

Install Steam on Ubuntu (Flatpak) & Play Windows Games with Proton

Install Steam on Ubuntu 24.04 LTS (Flatpak) & Play Windows Games with Proton


Install Steam on Ubuntu using Flatpak, enable Proton, and play even Windows-only games. A simple step-by-step guide perfect for beginners.Want to play games through Steam — including titles made only for Windows?

No problem!

In this article I walk you step by step through installing Steam via Flatpak, enabling Proton, and getting to your first games.

Updated: August 13, 2025 • Ubuntu 24.04 LTS (Noble Numbat)

The .deb packages “steam” and “steam-installer” are currently problematic due to missing dependencies. With the Flatpak build you can get Steam running quickly and reliably — including Windows games via Proton.

Video guide

👉 Watch the video here (insert your link).

Step-by-step: Install Steam via Flatpak

🧰 Step 1: Install Flatpak

If Flatpak isn’t installed yet, run:

sudo apt update
sudo apt install flatpak -y

🌐 Step 2: Add Flathub

Steam is distributed on the Flathub repository. Add it with:

sudo flatpak remote-add --if-not-exists flathub https://flathub.org/repo/flathub.flatpakrepo

Afterwards, sign out and back in or reboot so Flatpak is fully initialized.

🎮 Step 3: Install & launch Steam

flatpak install flathub com.valvesoftware.Steam
flatpak run com.valvesoftware.Steam

On first launch, Steam downloads updates and prompts you to sign in.

🪄 Step 4: Enable Proton (Steam Play)

  1. Start Steam.
  2. Click Steam → Settings.
  3. Open Steam Play.
  4. Tick:
    • ✅ Enable Steam Play for supported titles
    • ✅ Enable Steam Play for all titles
  5. Select the latest Proton version (e.g., Proton 9.0 or Experimental).

This lets you run many Windows-only games on Linux.

🔧 Step 5 (optional): Proton GE (Game Edition)

Proton GE is a community build with additional patches that improve compatibility for some games.

  1. Download Proton GE from GitHub.
  2. Create this folder:
mkdir -p ~/.var/app/com.valvesoftware.Steam/data/Steam/compatibilitytools.d
  1. Extract the downloaded .tar.gz directly into that folder.
  2. Restart Steam → in a game’s Properties → Compatibility you can pick Proton GE.

🛠️ Tip: Folder access & sandbox (Flatpak)

Flatpak isolates apps. If Steam should access additional folders (e.g., external drives), install Flatseal:

flatpak install flathub com.github.tchx84.Flatseal

Open Flatseal → choose Steam → grant access to the folders/devices you want.

Flatpak Steam shows “udev rules don’t seem to be installed” — how to fix it

Warning on launch:

“Steam input devices udev rules don't seem to be installed. If you experience issues with gamepads, consider installing 'steam-devices' package using your distribution package manager.”

What’s going on?

The Flatpak sandbox restricts access to devices (e.g., /dev/input). For gamepads to work, Steam needs proper permissions and udev rules on the system.

✅ Fix for the Flatpak build

Step 1: Allow access to input devices

sudo flatpak override com.valvesoftware.Steam --device=all --filesystem=/dev/input

Step 2: Install udev rules on the system (Ubuntu/Linux Mint/Debian)

sudo apt install steam-devices

📌 After that

  • Unplug and replug your gamepad.
  • Restart Steam (or reboot the PC if issues persist).

Check that you’re using the Flatpak build

flatpak list | grep Steam

If com.valvesoftware.Steam appears, you’re on the Flatpak build.

At-a-glance fix (table)

Step Command
1. Allow device access sudo flatpak override com.valvesoftware.Steam --filesystem=/dev/input --device=all
2. Install udev rules sudo apt install steam-devices

Then

  • Reconnect the gamepad.
  • Restart Steam:
    flatpak run com.valvesoftware.Steam
    
  • Under Settings → Controller, check that the device is detected.

🕹️ Flatpak vs .deb vs Snap — which Steam variant fits best?

Key differences

Characteristic Flatpak .deb (APT) Snap
Isolation (sandbox) Yes No Yes
Hardware access Restricted, extendable Full Restricted
Updates Via Flatpak (system-agnostic) Via APT Automatic
Dependencies Bundled System libraries Bundled
Disk footprint Larger Smaller Larger
Compatibility Broad; sometimes needs tweaking Excellent on Debian/Ubuntu Often weaker for gaming/VR

Recommendations by distribution

Distribution Recommended Steam variant Why
Ubuntu / Linux Mint / Pop!_OS .deb or Flatpak .deb for full integration; Flatpak for sandboxing
Fedora Flatpak Better supported than Snap; .rpm not official
Arch Linux / Manjaro Flatpak or AUR Flatpak is easier; AUR is flexible
openSUSE Flatpak .rpm varies; Flatpak tends to be more stable
Steam Deck (SteamOS) Flatpak (default) Valve’s intended setup
Debian .deb Best integration with APT

⚙️ Tip: Extend gamepad & device access in Flatpak

flatpak override com.valvesoftware.Steam --filesystem=/dev/input --device=all --filesystem=home

Even easier with Flatseal (a permissions GUI).

💬 My choice

I run Steam as a Flatpak on Ubuntu (Cinnamon). After a quick permissions tweak it’s stable and trouble-free.

FAQ

Do the .deb packages “steam”/“steam-installer” work reliably on Ubuntu 24.04?

They hit dependency issues at the moment. The Flatpak build is the fastest and most stable route.

Which Proton version should I use?

Use the latest stable release or Proton Experimental. For problematic titles, try Proton GE.

How do I let Steam access external drives?

Use flatpak override (see above) or the Flatseal GUI to grant specific folders.

How do I confirm that my Steam install is the Flatpak one?

Run:

flatpak list | grep Steam

If it shows com.valvesoftware.Steam, you’re on Flatpak.


Launcher for the Steam software distribution service

https://flathub.org/en/apps/com.valvesoftware.Steam

Note: This is a community package of Steam gaming plaform not officially supported by Valve.

Steam is a software distribution service with an online store, automated installation, automatic updates, achievements, SteamCloud synchronized savegame and screenshot functionality, and many social features.

Note: To add a game library on another drive, first you need to grant the app access to it: https://flathub.org/en/apps/com.valvesoftware.Steam


The official Steam for Linux can be found at – https://store.steampowered.com/


Linux problems and how to fix them

Linux Post‑Install Troubleshooting (2025)

 After a fresh install On new hardware, issues usually boil down to drivers or firmware. Keep your kernel/firmware/Mesa current, install the right GPU/Wi‑Fi drivers, and use the diagnostics at the end to verify. Each topic is split by distribution: Ubuntu, Debian, Fedora, openSUSE, Manjaro, Arch.

After a fresh install

On new hardware, issues usually boil down to drivers or firmware. Keep your kernel/firmware/Mesa current,
install the right GPU/Wi-Fi drivers, and use the diagnostics at the end to verify.

Graphics

Intel

Intel iGPUs use the in‑kernel i915 driver with Mesa. Black screen after suspend? Try disabling PSR.

Ubuntu

sudo nano /etc/default/grub
# Add to GRUB_CMDLINE_LINUX_DEFAULT: i915.enable_psr=0
sudo update-grub
sudo apt update && sudo apt install linux-firmware mesa-utils
glxinfo | grep -i "OpenGL renderer"

Debian

sudo apt update && sudo apt install firmware-misc-nonfree mesa-utils
sudo nano /etc/default/grub  # add i915.enable_psr=0
sudo update-grub && sudo reboot

Fedora

sudo dnf upgrade --refresh
sudo dnf install mesa-dri-drivers mesa-vulkan-drivers vulkan-tools
sudo grubby --update-kernel=ALL --args="i915.enable_psr=0"
vulkaninfo | head || glxinfo | grep -i renderer

openSUSE

sudo zypper refresh && sudo zypper update
sudo zypper install Mesa-demo-x mesa-dri
sudo grub2-mkconfig -o /boot/grub2/grub.cfg

Manjaro

sudo pacman -Syu
sudo pacman -S mesa vulkan-intel mesa-utils
sudo update-grub
glxinfo | grep -i renderer

Arch

sudo pacman -Syu mesa vulkan-intel mesa-utils
sudo nano /etc/default/grub  # add i915.enable_psr=0
sudo grub-mkconfig -o /boot/grub/grub.cfg

AMD

Use the open amdgpu driver (plus firmware). For some laptops, kernel arg amdgpu.backlight=0 fixes black screen after suspend.

Ubuntu

sudo apt update && sudo apt install linux-firmware mesa-vulkan-drivers mesa-utils
sudo nano /etc/default/grub  # add amdgpu.backlight=0
sudo update-grub && sudo reboot
dmesg | grep -i "Loading AMDGPU firmware"

Debian

sudo apt install firmware-amd-graphics linux-firmware mesa-utils
sudo nano /etc/default/grub  # add amdgpu.backlight=0
sudo update-grub && sudo reboot

Fedora

sudo dnf upgrade --refresh
sudo dnf install mesa-dri-drivers mesa-vulkan-drivers
sudo grubby --update-kernel=ALL --args="amdgpu.backlight=0"

openSUSE

sudo zypper refresh && sudo zypper update
sudo zypper install Mesa-dri Mesa-vulkan-drivers
sudo grub2-mkconfig -o /boot/grub2/grub.cfg && sudo reboot

Manjaro

sudo pacman -Syu
sudo pacman -S mesa vulkan-radeon mesa-utils
sudo update-grub

Arch

sudo pacman -Syu mesa vulkan-radeon mesa-utils
sudo nano /etc/default/grub  # add amdgpu.backlight=0
sudo grub-mkconfig -o /boot/grub/grub.cfg

NVIDIA

For performance and PRIME, install the proprietary driver (not Nouveau).

Ubuntu

ubuntu-drivers devices
sudo apt install nvidia-driver-535
sudo apt install nvidia-prime  # hybrids
sudo prime-select nvidia  # or: intel
sudo reboot
nvidia-smi

Debian

sudo apt install nvidia-driver firmware-misc-nonfree nvidia-prime
sudo reboot && nvidia-smi

Fedora (RPM Fusion)

sudo dnf install https://download1.rpmfusion.org/free/fedora/rpmfusion-free-release-41.noarch.rpm                  https://download1.rpmfusion.org/nonfree/fedora/rpmfusion-nonfree-release-41.noarch.rpm
sudo dnf install akmod-nvidia xorg-x11-drv-nvidia-cuda
sudo reboot && nvidia-smi

openSUSE

sudo zypper addrepo --refresh https://download.nvidia.com/opensuse/tumbleweed nvidia
sudo zypper refresh
sudo zypper install --from nvidia x11-video-nvidiaG06 nvidia-glG06
sudo reboot && nvidia-smi

Manjaro

sudo mhwd -a pci nonfree 0300
# or:
sudo mhwd -i pci video-nvidia
sudo reboot && nvidia-smi

Arch

sudo pacman -Syu nvidia nvidia-utils nvidia-settings
# for LTS kernel: nvidia-lts
sudo reboot && nvidia-smi

Hybrid laptops (Intel + NVIDIA/AMD)

Tips

# Force Wayland + NVIDIA (experimental)
sudo sed -i 's/GRUB_CMDLINE_LINUX_DEFAULT="\(.*\)"/GRUB_CMDLINE_LINUX_DEFAULT=" nvidia-drm.modeset=1"/' /etc/default/grub
sudo update-grub && sudo reboot
# Ubuntu/Debian: switch GPUs
sudo apt install nvidia-prime
sudo prime-select nvidia   # or: intel

Wi‑Fi

Identify your adapter

lspci | grep -i network   # internal
lsusb                      # USB dongles
sudo lshw -C network | grep -E "description|product|vendor|driver" -A2

Ubuntu

sudo apt update
sudo apt install bcmwl-kernel-source        # Broadcom
sudo apt install rtl8821ce-dkms || true     # Realtek example
sudo apt install firmware-iwlwifi && sudo modprobe iwlwifi  # Intel
sudo systemctl restart NetworkManager

Debian

sudo apt install firmware-iwlwifi firmware-realtek firmware-brcm80211
sudo modprobe iwlwifi || true
sudo systemctl restart NetworkManager

Fedora

sudo dnf upgrade --refresh
sudo dnf install akmod-wl kernel-devel kernel-headers   # Broadcom
sudo systemctl restart NetworkManager

openSUSE

sudo zypper install broadcom-wl kernel-default-devel
sudo systemctl restart NetworkManager

Manjaro

sudo pacman -Syu
yay -S rtl8821ce-dkms-git   # example
sudo systemctl restart NetworkManager

Arch

sudo pacman -Syu linux-firmware networkmanager
yay -S rtl8821ce-dkms-git   # example
sudo systemctl enable --now NetworkManager

Stability tips

  • Try 2.4 GHz channels 1/6/11 if links drop.
  • Disable Wi‑Fi power saving if it stalls under load.
  • Use a USB‑Ethernet dongle to fetch drivers when offline.

Bluetooth

Ubuntu/Debian

sudo apt install bluetooth bluez blueman linux-firmware
sudo systemctl enable --now bluetooth
bluetoothctl  # power on; agent on; scan on

Fedora

sudo dnf install bluez blueman bluez-tools
sudo systemctl enable --now bluetooth

openSUSE

sudo zypper install bluez blueman
sudo systemctl enable --now bluetooth

Manjaro/Arch

sudo pacman -S bluez bluez-utils blueman
sudo systemctl enable --now bluetooth

If pairing fails

rfkill list
rfkill unblock bluetooth
sudo systemctl restart bluetooth
dmesg | grep -i bluetooth   # check firmware messages

LAN / Ethernet

lspci | grep -i ethernet
ip a
sudo nmcli device connect && nmcli device status
# Realtek r8168 (Ubuntu)
sudo apt install r8168-dkms && sudo reboot

Input devices

Keyboard

Ubuntu/Debian

sudo dpkg-reconfigure keyboard-configuration
sudo apt install numlockx
numlockx on

Fedora/openSUSE

sudo dnf install numlockx || sudo zypper install numlockx
numlockx on

Fn keys

xev  # or evtest
# Brightness fix:
# Ubuntu/Debian
sudo sed -i 's/GRUB_CMDLINE_LINUX_DEFAULT="\(.*\)"/GRUB_CMDLINE_LINUX_DEFAULT=" acpi_backlight=vendor"/' /etc/default/grub
sudo update-grub && sudo reboot
# Arch/Manjaro
sudo sed -i 's/GRUB_CMDLINE_LINUX_DEFAULT="\(.*\)"/GRUB_CMDLINE_LINUX_DEFAULT=" acpi_backlight=video"/' /etc/default/grub
sudo grub-mkconfig -o /boot/grub/grub.cfg

Mouse

xinput list
sudo apt install xserver-xorg-input-libinput    # Ubuntu
sudo apt install solaar  # Logitech; Fedora: sudo dnf install solaar

Touchpad

gsettings set org.gnome.desktop.peripherals.touchpad tap-to-click true
sudo apt install xserver-xorg-input-libinput || sudo apt install xserver-xorg-input-synaptics  # Debian

Stylus

# Ubuntu/Debian
sudo apt install xserver-xorg-input-wacom libwacom2
# Manjaro/Arch
sudo pacman -S xf86-input-wacom
# Fedora
sudo dnf install xorg-x11-drv-wacom libwacom
xsetwacom --list devices
xsetwacom set "Wacom Pen stylus" MapToOutput HEAD-0

Game controllers

sudo apt install jstest-gtk || sudo dnf install jstest-gtk || sudo pacman -S jstest-gtk
sudo apt install xpad xboxdrv || sudo pacman -S xpad || yay -S xboxdrv
sudo apt install ds4drv || yay -S dualsensectl

Audio: no sound / mic

sudo apt install pipewire pipewire-pulse wireplumber   # Ubuntu 22.04+
systemctl --user --now enable wireplumber
pactl list short sinks && pactl list short sources
pulseaudio -k || true
systemctl --user restart pipewire pipewire-pulse

Missing video codecs

Ubuntu/Debian

sudo apt install ubuntu-restricted-extras ffmpeg

Fedora

sudo dnf install rpmfusion-free-release-tainted
sudo dnf install ffmpeg gstreamer1-plugin-openh264

openSUSE

sudo zypper install ffmpeg-6 libavcodec-full gstreamer-plugins-ugly

Manjaro/Arch

sudo pacman -S ffmpeg gst-plugins-ugly gst-libav

Flatpak / Snap

flatpak update
flatpak permission-reset --all
sudo systemctl restart snapd

Wine / Proton

sudo dpkg --add-architecture i386
sudo mkdir -pm755 /etc/apt/keyrings
wget -nc https://dl.winehq.org/wine-builds/winehq.key -O- | sudo gpg --dearmor -o /etc/apt/keyrings/winehq-archive.key
# add the correct WineHQ repo for your release, then:
sudo apt update
sudo apt install --install-recommends winehq-stable winetricks

For Steam games, enable Proton in Steam settings. Proton‑GE via ProtonUp‑QT often improves compatibility.

Slow / hot system

Laptop power management

sudo apt install tlp tlp-rdw powertop
sudo systemctl enable --now tlp
sudo powertop --calibrate

High CPU (iGPU + GNOME)

Try Xorg session (at login screen), or keep Mesa updated.

Dual‑boot: Windows missing in GRUB

# Ubuntu/Debian
sudo apt install os-prober
sudo sed -i 's/GRUB_DISABLE_OS_PROBER=true/GRUB_DISABLE_OS_PROBER=false/' /etc/default/grub || true
sudo update-grub
# Fedora/openSUSE
sudo grub2-mkconfig -o /boot/grub2/grub.cfg
# Arch/Manjaro
sudo pacman -S os-prober
sudo grub-mkconfig -o /boot/grub/grub.cfg

Ensure both systems boot in UEFI mode and Windows EFI entry exists (BitLocker can complicate detection).

Time / timezone

sudo timedatectl set-timezone Europe/London
sudo timedatectl set-local-rtc 1 --adjust-system-clock   # if dual‑booting with Windows

English (UK) locale

sudo apt install language-pack-en language-pack-gnome-en
sudo update-locale LANG=en_GB.UTF-8
locale

APT lock: could not get /var/lib/dpkg/lock-frontend

ps -p 7510 -o pid,cmd,etime
sudo kill -9 7510
sudo rm -f /var/lib/dpkg/lock-frontend /var/cache/apt/archives/lock
sudo dpkg --configure -a
sudo apt update && sudo apt upgrade

Diagnostics appendix

Hardware & drivers

inxi -Fazy  # if installed
lspci -nnk | grep -A3 -E "VGA|Network|Ethernet"
lsusb
sudo dmesg -T | tail -n 200

GPU acceleration

glxinfo | grep -i "OpenGL renderer"
sudo apt install glmark2 || sudo dnf install glmark2 || sudo pacman -S glmark2
glmark2


Printers

Printers - Brother

fedora

Installing a Brother Printer on Fedora Linux

Example model – HL-1210WE (use your printer model instead)


1. Download the Driver

  1. Open the official Brother website:
    https://www.brother.cz/support/hl1210we/downloads
    (Search for your exact printer model.)
  2. In the Drivers section, download the file:
    linux-brprinter-installer-2.2.4-1.gz
    (The version number may differ depending on your release.)

2. Extract and Run the Installer

Open the terminal and run:

cd ~/Downloads
gunzip linux-brprinter-installer-2.xxxxx.gz
chmod +x linux-brprinter-installer-2.2xxxxx
sudo bash linux-brprinter-installer-2.2xxxxx

3. Driver Installation

  1. The installer will ask for the printer name → type exactly: HL-1210WE (your model).
  2. It will then download and install the following packages:
    • LPR driver
    • CUPS wrapper

If libraries are missing, install them:

sudo dnf install glibc.i686 libstdc++.i686

4. SELinux Settings

The installer automatically adds the required rules and sets SELinux contexts.


5. Connection Method (Device URI)

  • 13 (Auto / dnssd) → works if the printer is on the network and Fedora detects it automatically (recommended if unsure).
  • 12 (Specify IP address) → recommended if you know the printer’s IP address (more reliable, IP does not change).

Example:

socket://192.168.1.50

6. Test Print

When prompted, confirm the test print with y.
At the end, press Enter.


7. Verify Installation

Check printer status:

lpstat -p -d

Example output:

printer HL1210W is idle. enabled since ...

8. Manual Test

(Use your printer model name!)

echo "Test HL-1210WE Fedora" | lp -d HL1210W

Or via GUI:
Settings → Printers → HL1210W → Test Page


9. If Printing Does Not Work

  1. Check the printer’s IP address (on your router or network status report).
  2. Try pinging it:
ping -c 4 192.168.x.x
  1. If the IP address keeps changing, set a static IP in your router and reinstall using option 12 (Specify IP).

✅ Quick Summary:

  • Download driver from Brother website
  • Extract .gz, run installer
  • Enter printer model (e.g., HL-1210WE)
  • Choose connection type (preferably fixed IP → socket://…)
  • Perform test print → done!

How to Work with Archives in Linux: Extracting and Creating Password-Protected Files

File Roller (7zip, zip, rar)

File Roller is a graphical archive manager for Linux, similar to the built-in .zip support in Windows.
After installing the p7zip packages and plugins, it can also handle formats like 7z, rar, and supports both extracting and creating password-protected archives.

  • Extracting a password-protected archive:
    Simply open the archive in File Roller and enter the password when prompted.
  • Creating a password-protected archive:
    Create a new archive, choose a format (most commonly 7z), and in the settings enable Encrypt with password, where you enter your password.

File Roller in Linux is therefore something like a replacement for the built-in .zip in Windows, but with the ability to work with many more formats and password-protected files.


Ubuntu / Debian

sudo apt update
sudo apt install p7zip-full p7zip-rar file-roller
# optional plugins:
sudo apt install file-roller-plugin-unarchiver

Fedora

sudo dnf install p7zip p7zip-plugins file-roller

openSUSE

sudo zypper install p7zip p7zip-full file-roller

Manjaro / Arch

sudo pacman -Syu p7zip file-roller

Usage

  • Extracting a password-protected archive:
    Open the archive in File Roller → enter the password when prompted.
  • Creating a password-protected archive:
    File → New Archive → choose type 7z → check Encrypt with password in the settings.


Last updated: August 2025